Sie sind nicht angemeldet.

1

Donnerstag, 28. April 2011, 13:08

Ferrari 312T - GP F1 Monaco - Niki Lauda - Hasegawa - 1/20

Hi everyone! I decided to start building the Ferrari, in which Niki Lauda won the 1975 Monaco GP F1, and eventually became world champion:


The kit is pretty well detailed as you will notice during this build, but still I purchased a small upgrade set made by Hasegawa, consisting of some photo-etched parts (wingend plates, brake discs, radiators,..) but more importantly aluminium trumpet intakes and protective mesh. It obviously won't be an OOB-build (out of box)...

First I dryfitted the central 'bathtub' with some masking tape. The parts haven't been chromed which is fine by me because that spares me the dechroming work.


Next I cleaned up all the body parts, except for the cowling. I still have to deepen the panel lines to obtain some more shadow.


Next I dryfitted these parts to the chassis.


While fitting the cowling I discovered a problem: the cowling is about 1mm to small. This is easily fixed with some plastic strip though.


Dryfitting the cowling parts to the body gives this result. The green arrow to the left points to the area which is covered by the plastic strip, the arrow to the right points to a panel line that I won't simply deepen, but I will cut it off completely. The front nose part was a separate part and it would look ridiculous showing the open model with a cowling in one part where it should be two. Right now I leave it on because it's easyer for dryfitting purposes.


*** WWW.SENNAKE.BE ***

2

Donnerstag, 28. April 2011, 13:13

Here we see a complete dryfit. The rims are cleaned up but not fixed yet, since they have to be spraypainted in two colors (gold and aluminium), which is a lot easier when the parts are separated. Again I'm happy that Hasegawa didn't chrome the parts because this would only lead to dechroming them again.


*** WWW.SENNAKE.BE ***

3

Donnerstag, 28. April 2011, 13:34

Next i start building the engine. Assembling the plastic parts doesn't cause any problems, just make sure you replace the standard part E9 by the extra part F1 (separate frame). Part E9 is for building the Ferrari 312T2... After spraypainting all the parts I can fix them together, after which I added some smoke washes. The first picture shows the engine bottom.


I did added some details to the engine top though. I had to add all the wiring which is complete absent, even in the upgrade kit. So I drilled out 12 holes at the engine cilinder heads and 12 more holes in the electric distributor.


The fuel lines are a little harder because the kit fuel pump is to small to fit 12 holes. So I cut it away and replace it by a homemade pump. Adter drilling out all the holes I fix the wiring according to the Tamiya 1/12 instructions that I have at hand.


Once all the wiring is in place I painted the fuel lines with some clear yellow and I drybrushed the black wires. Next I fixed the white central filter in place.


Next I used the upgrade kit parts. The aluminium intakes were glued in place, after which I fixed the protective pesh with super glue.


*** WWW.SENNAKE.BE ***

Hubra

Moderator

Beiträge: 11 439

Realname: Michael

Wohnort: Niederdürenbach-Hain

  • Nachricht senden

4

Donnerstag, 28. April 2011, 13:43

Hallo Sennake.

Die maximal erlaubte Bildergröße hier im Forum beträgt 800 x 800 Pixel.
Bitte dieses kurzfristig zu ändern.

Gruß Micha.


Ab jetzt könnt ihr eure Bilder direkt in eure Beiträge einstellen!

5

Donnerstag, 28. April 2011, 13:51

Then I put the body parts in gray primer, after which I spraypainted them with Tamiya X-7 red (acryl). That didn't work out very well because the paint dries very slowly, resulting in a few finger prints when I tried to handle the parts after a week. So I waited another week, I sanded away the prints, and I spraypainted the parts again with TS-8 Italian red this time. That is a lot better. I also decided to open one of the acces panels to be able to show the nice details underneath.


I spraypainted the chassis with Testor's aluminium (it was my last bottle so next time I will have to use Alclad).


The cowling was painted in red, the intake was painted with TS-26 pure white. The parts are dryfitted but they still have to be fixed before I can start to apply decals.


The tires have been sanded down to get rid of the ugly seams, with sanding paper N° 120. Testin with N° 180 didn't work well, so make sure to use 120, otherwise the rubber will melt. Next I spraypainted the rims with Testor's aluminium; the centers were painted with Titanium Gold and finished off with smoke. I still have to add some 'mishmash' air valves and counter weights.


*** WWW.SENNAKE.BE ***

6

Donnerstag, 28. April 2011, 14:03


Hallo Sennake.

Die maximal erlaubte Bildergröße hier im Forum beträgt 800 x 800 Pixel.
Bitte dieses kurzfristig zu ändern.

Gruß Micha.


Ok, I will change the resolution soon.

*** WWW.SENNAKE.BE ***

7

Donnerstag, 28. April 2011, 16:56

Hello,
and welcome to this forum.
Its a very nice start you show us here!

I will watch this with interest,becoause my last project was the same car,but in 1/12 scale.

Keep up the great work!

Christian


Resin Kits und Kleinteile zu Verkaufen!

www.mezzo-mix-models.jimdo.com

8

Donnerstag, 28. April 2011, 23:08

Back to the engine.

Or rather, the very part which gave the Ferrari 312T the 'T' in its name: the transversale gearbox.

The pictures show the gearbox before fitting it to the engine. Notice the photo-etched brake discs from the upgrade kit, and the air scoops which are made from clear parts in order to paint them just like the tranparant scoops looked in reality. To the back I missed the brake lines, so I added them using some mishmash parts. I still have to fix a brake duct to the front of the engine.

The shock absorbers were cast in one piece, not really a realistic sight. So we keep the top and bottom tips, and cut away everything in between. With some aluminium tube and brass wire I scratchbuild new springs. The result is a lot more realistic.

The central support of the gerabox also should show some openings to be able to fit some wiring, so we drill them out.


Another picture from the side where you can see the home made shocks...


Here you can see the opeings in the support, as well as the fixing points for the supports.


Finally a picture of the gearbox rear end, showing the brake cilinder and brake ducts.


And here the joining of the engine and gearbox has been realized; we take a look at the bottom because this won't be visible anymore later on.


*** WWW.SENNAKE.BE ***

9

Donnerstag, 28. April 2011, 23:13

Next a few pictures of the top of the egine block.


Next I added the long supports to the sides, and the extra supports on top of the engine holding the electric components like the coil. I also added the missing brake duct. Later on I will add some more wiring, but in order to do that I will have to fix the engine to the chassis first.


*** WWW.SENNAKE.BE ***

10

Donnerstag, 28. April 2011, 23:21

Still missing are the exhausts. In the seventies they used to be white at Ferrari. Why exactly they used to do this I don't know, but of course I want to keep it historical correct so white they will be!


Adding the brake lines to the rear has some consequences. When I tried to dryfit the central wing support, I encountered a problem: the Hasegawa part is not correct to be fixed to the rear with the brake cilinder in place. So I have to make some changes to the support and to the engine rear, following the reference pictures.


This picture shows the rear end with arrows pointing to the holes where I will fix the metal pins in.


And as you can see for yourself the pins fit into the holes, putting the central support on its place again while the brake cilinder is left where it is...


*** WWW.SENNAKE.BE ***

11

Donnerstag, 28. April 2011, 23:26

Now I concentrate on the wheels again. This time I add the valves and counter weights. I still have to spraypaint the GoodYear logo's.


Then I take a look at the front end. I had to add some extra details (brake cilinders again) but most of the parts are pretty accurate.


There still is a lot of free room inthere, but there is a good reason for: the front suspension arms still have to fixed. I decided to replace the plastic springs by brass springs again.


*** WWW.SENNAKE.BE ***

12

Donnerstag, 28. April 2011, 23:30

Just checking if everything looks ok still, so I dryfit the engine to the chassis. So far, so good.


I also dryfit the wheels to get an idea.


And finally I also dryfit the cowling, just for fun.


Wordt ongetwijfeld vervolgd!

*** WWW.SENNAKE.BE ***

13

Donnerstag, 28. April 2011, 23:35

I installed the front suspension arms and added some wiring as well as some photo etched details.


Once this as done, I could start finishing the front suspension. The air scoops received the same treatment as the rear scoops. The brake discs were upgraded with photo etched discs. Afterwards I added a smoke wash for some extra realism.


This is how the front of the model looks like at this point:


*** WWW.SENNAKE.BE ***

14

Donnerstag, 28. April 2011, 23:40

I put the model on two supports, making it look like it's in the Ferrari workshop:


The bodyparts at the sides aren't decalled yet, but I can't resist to dryfit them.


And while we're at it, we also dryfit the wheels...


I started decalling the cowling. The decals are of very good quality (Catrograph). I still have to clearcoat the part.


Finally I put all the parts together on the picture. It is starting to look like something ;)


*** WWW.SENNAKE.BE ***

Beiträge: 1 150

Realname: Martin

Wohnort: Niederösterreich

  • Nachricht senden

15

Freitag, 29. April 2011, 07:06

Hello sennake :wink:

Excuse me, but my english is not so good.
:heul:
It´s a very great job. I´m an Ferrarifan and the 312 T is a super formula 1 car.
I have a question.How did you get the air scoops ?

Best regards Martin
Aktuelles Projekt: ???
Zuletzt gebaut:Ferrari F1 87/88c Fujimi, Studio 27, Tabu Design 1:20


16

Freitag, 29. April 2011, 09:23

Hello sennake :wink:

Excuse me, but my english is not so good.
:heul:
It´s a very great job. I´m an Ferrarifan and the 312 T is a super formula 1 car.
I have a question.How did you get the air scoops ?

Best regards Martin
Hi Martin,

you can write in German if you like, reading German is no problem for me, it's just the writing that is a little rusty for me ;)

I painted the airscoops with a mixture of clear orange and clear yellow; once dry I added a layer of Tamiya flat base. Oh yes, I also glued the clear parts with 2 component epoxy glue to get as little glue marks as possible.

*** WWW.SENNAKE.BE ***

17

Freitag, 29. April 2011, 09:42

Hallo sennake,

schön zu lesen :hey: :D

Zitat

you can write in German if you like, reading German is no problem for me, it's just the writing that is a little rusty for me
........., dann brauch ich mir hier keine Abstammeln auf Englisch :pfeif: ;) .

Erstmal auch von mir noch ein herzliches Willkommen :prost: .

Super Klasse Arbeit die Du ablieferst, gefällt mir :ok: :ok: :ok: :ok: :ok: :respekt: :dafür: auch die Bilder sind erste Sahne. :thumbsup:
Machs gut, freue mich jetzt schon auf weitere Projekte von Dir.

:wink:
Gruß Andreas

Beiträge: 1 150

Realname: Martin

Wohnort: Niederösterreich

  • Nachricht senden

18

Freitag, 29. April 2011, 09:43

Hallo sennake :wink:

Danke für die Auskunft.
Ich kann English besser lesen als schreiben.
Wenn es kein Problem für dich ist, dann verstehen wir uns ja.
Ich hab noch den 312 T3 von Tamiya zu bauen, und da kann ich mir so einiges von dir abschauen. :smilie:

Schöne Grüße Martin
Aktuelles Projekt: ???
Zuletzt gebaut:Ferrari F1 87/88c Fujimi, Studio 27, Tabu Design 1:20


DominiksBruder

unregistriert

19

Freitag, 29. April 2011, 18:52

I think one words decribes your model kit at it's best: awesome! The details, wiring, engine parts, carburator, couter weighs (!) and a lot more are really great! It's a pleasure to see the parts together. It makes appetite for more!
There was a guy who wasn't that able to do this on 1/8. :respekt:

20

Freitag, 29. April 2011, 19:02


There was a guy who wasn't that able to do this on 1/8. :respekt:


Wenn du da wohl meinst? :saufen: :saufen: :saufen:


Resin Kits und Kleinteile zu Verkaufen!

www.mezzo-mix-models.jimdo.com

21

Freitag, 29. April 2011, 21:13

The suspension looks incredible, just like the real deal! Fantastic work over here! :thumbsup: :respekt:

22

Montag, 16. Mai 2011, 09:04

The bodyparts were clearcoated:


Then I started detailling the interior:


The dash board was installed and detailled as well:


I also finished the tires, I airbrushed the sponsor logo's:


Next I did a dryfitting:


And I spraypainted the radiators in chrome color:


To be continued!

*** WWW.SENNAKE.BE ***

23

Dienstag, 17. Mai 2011, 22:36

Hi Guy,

convincing work and photos, very inspiring

Micha

24

Donnerstag, 19. Mai 2011, 07:31

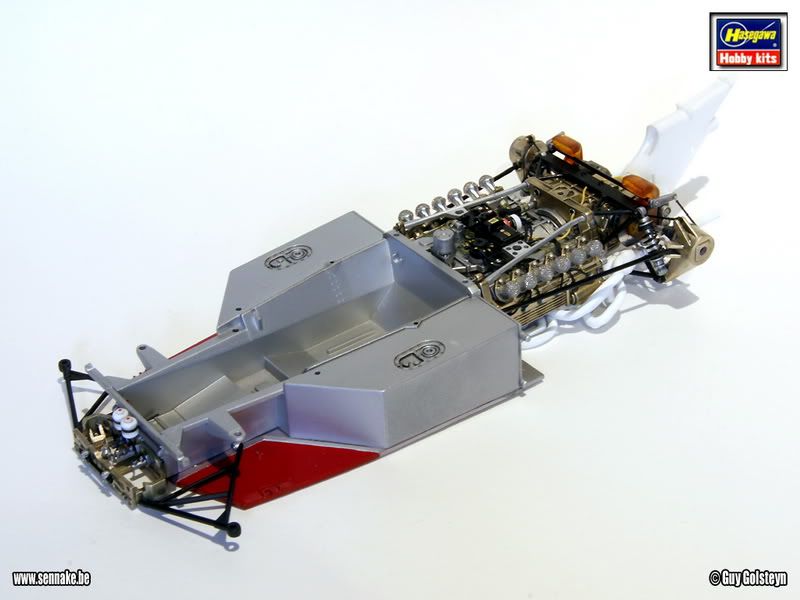
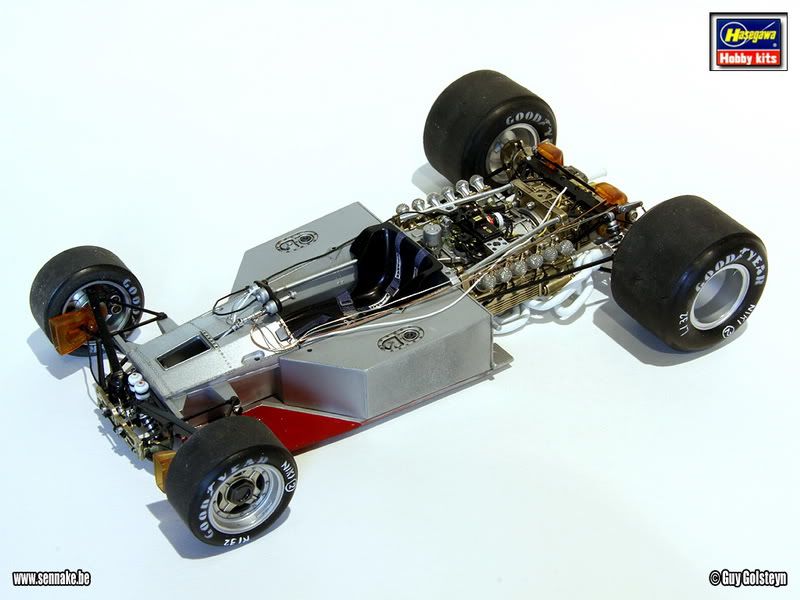
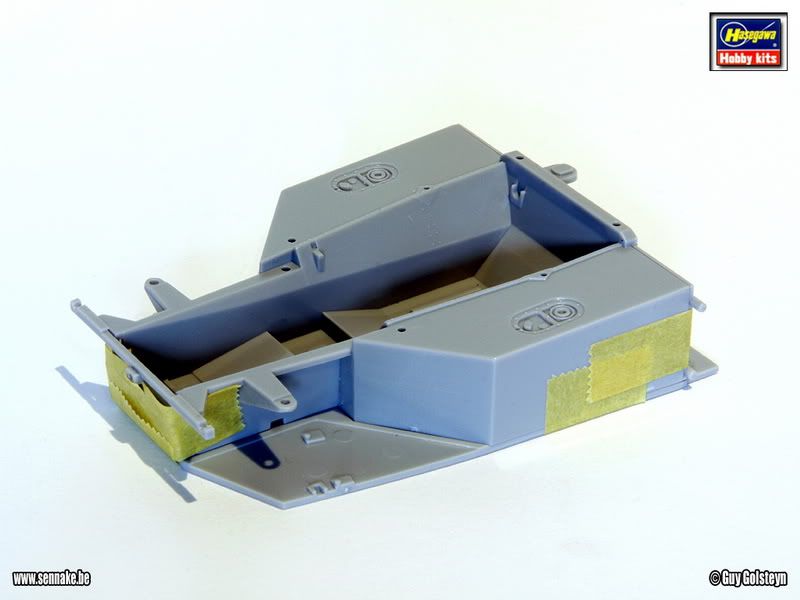
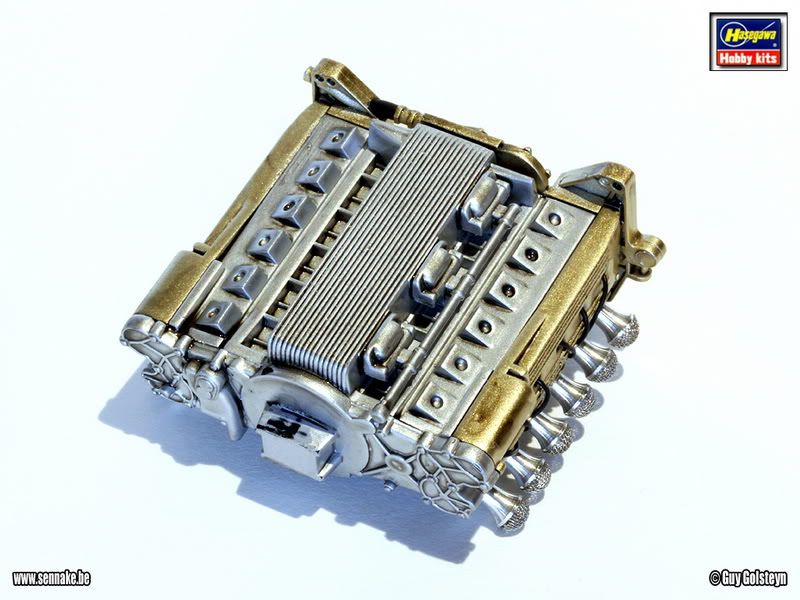
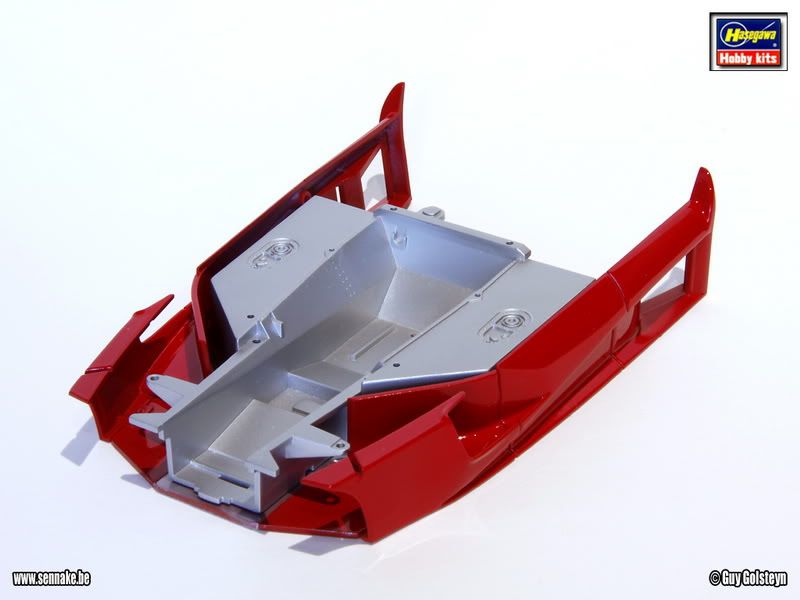
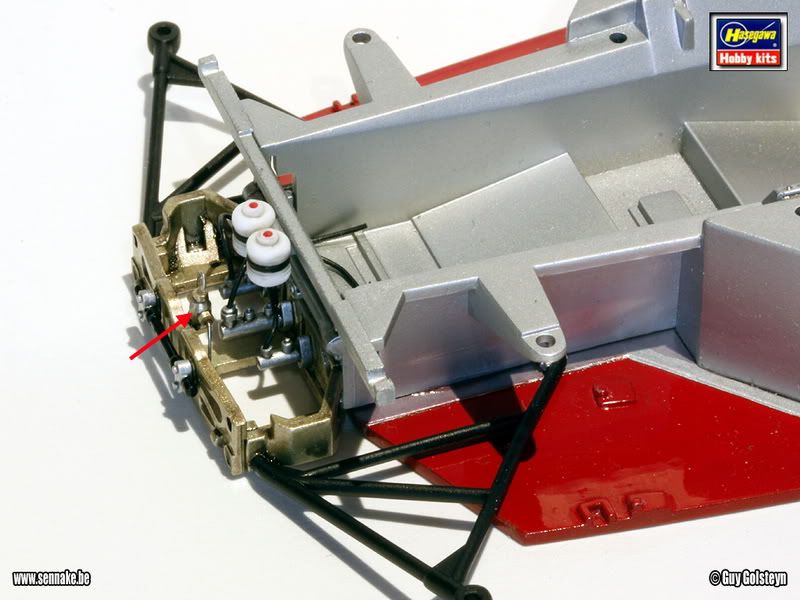
Next I fixed the radiator parts (or oil coolers) into the Ferrari, behind the gas tanks, next to the engine. I also fixed the rear spoiler support into place.


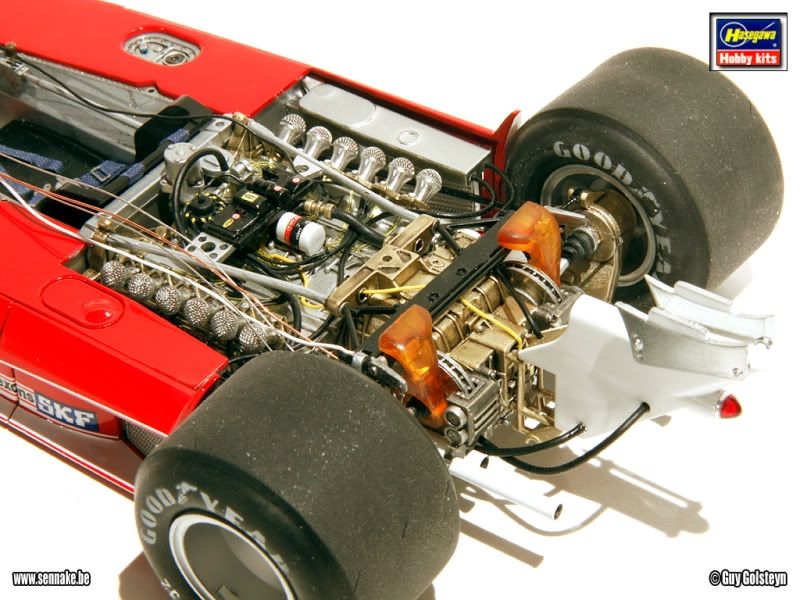
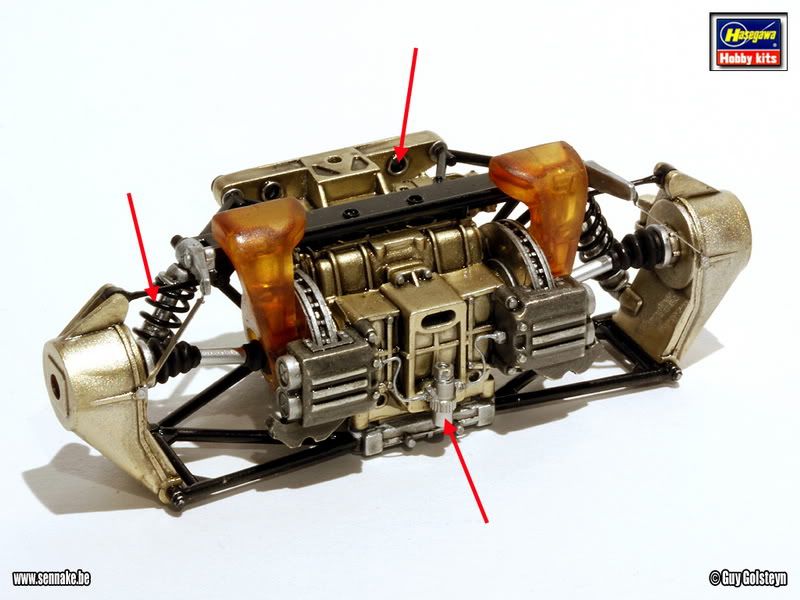
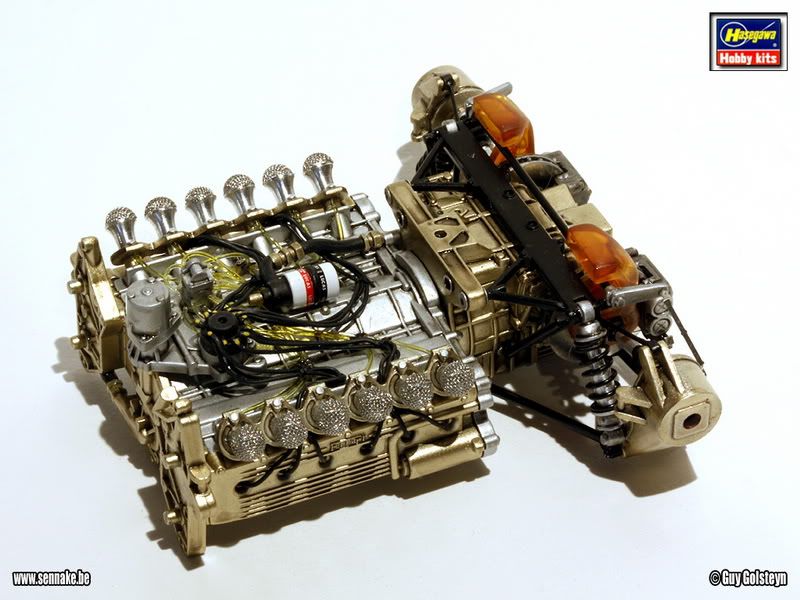
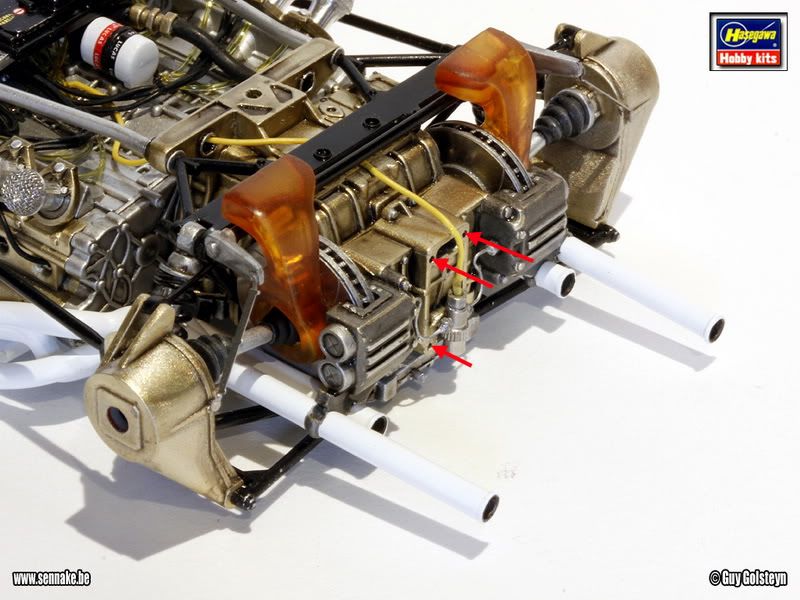
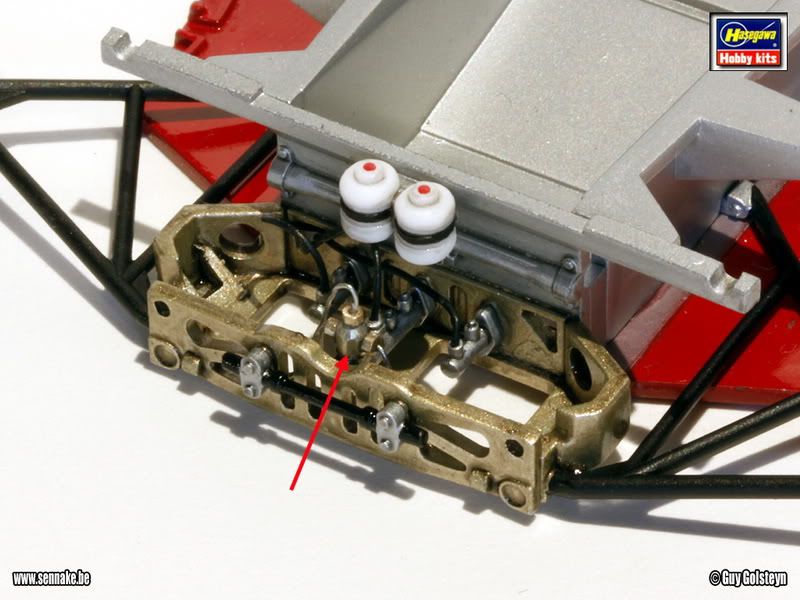
At the right hand side you will notice some extra details mainly in relation to the emergency swith. You can also see that the left oil cooler... isn't very visible anymore. But at least the radiator grills are visible through the openings of the body parts.


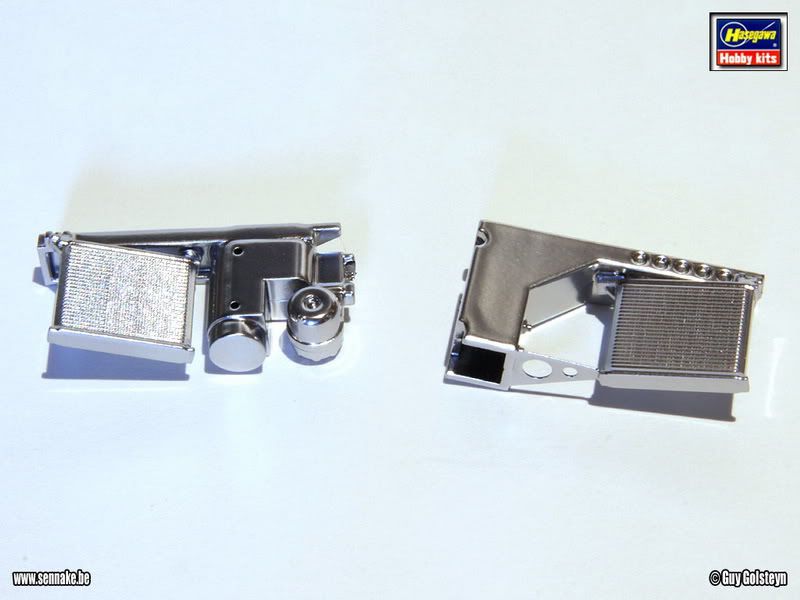
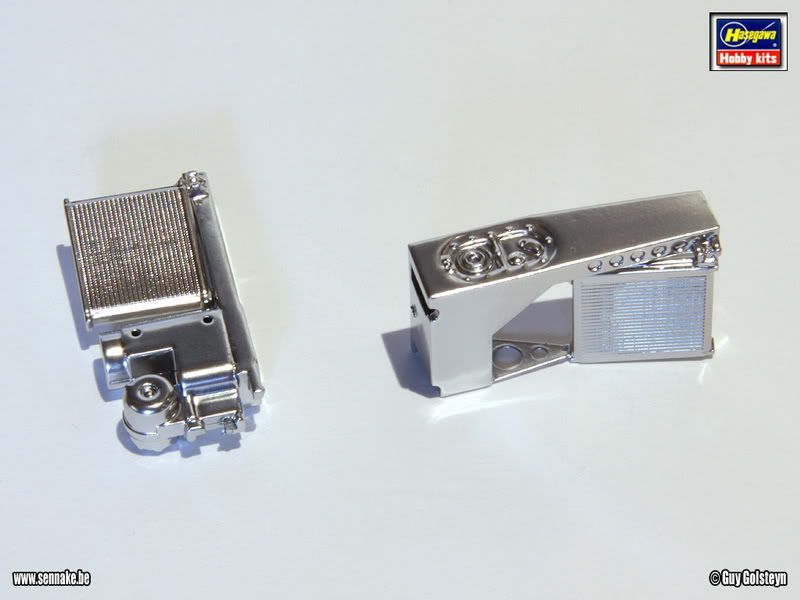
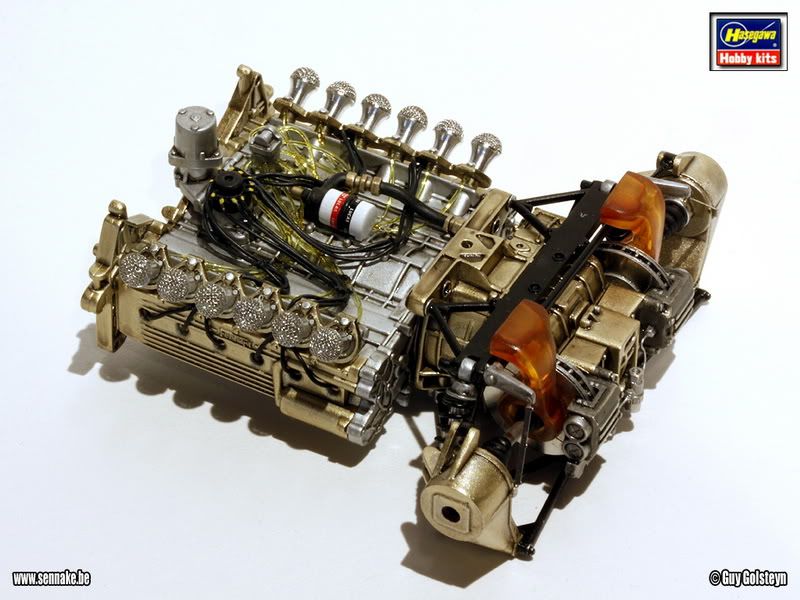
Here you see part of the right hand side radiator.


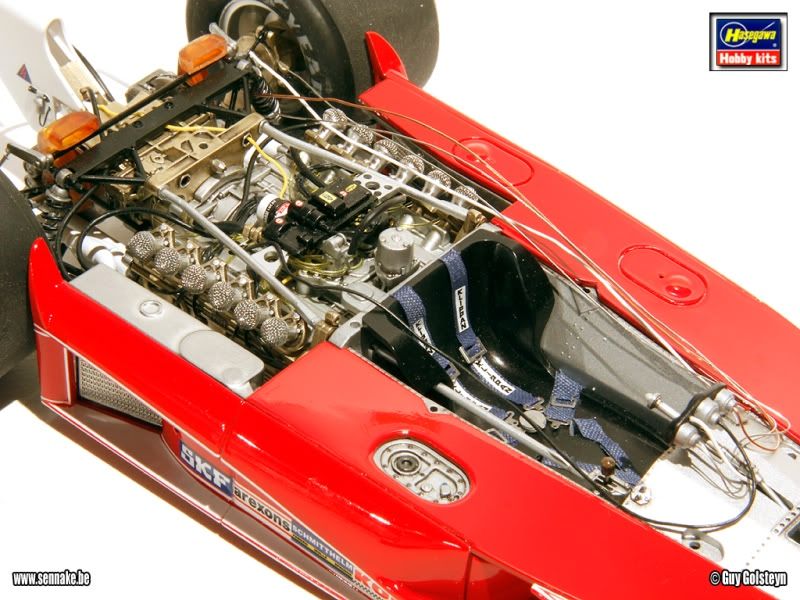
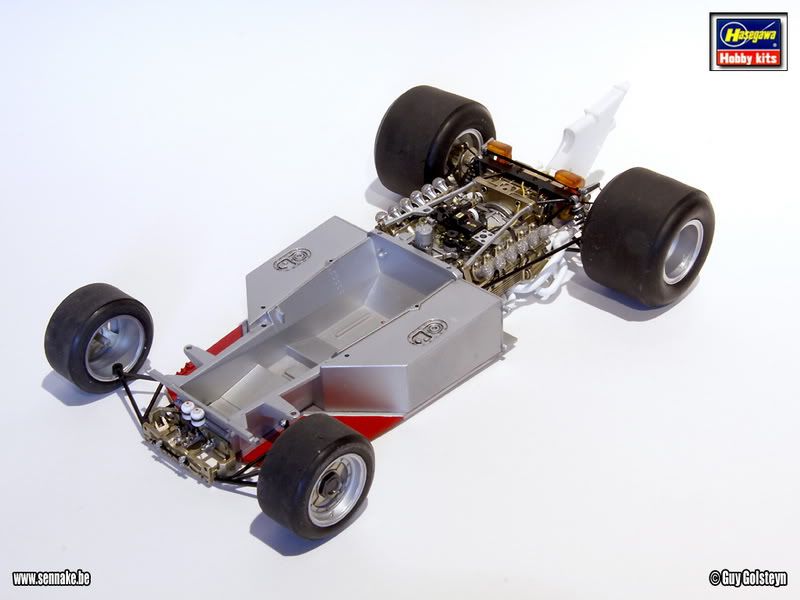
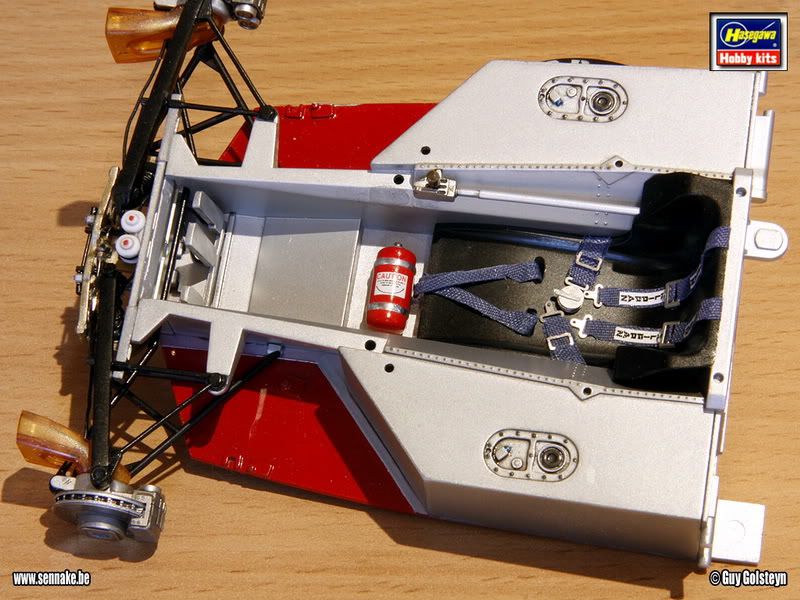
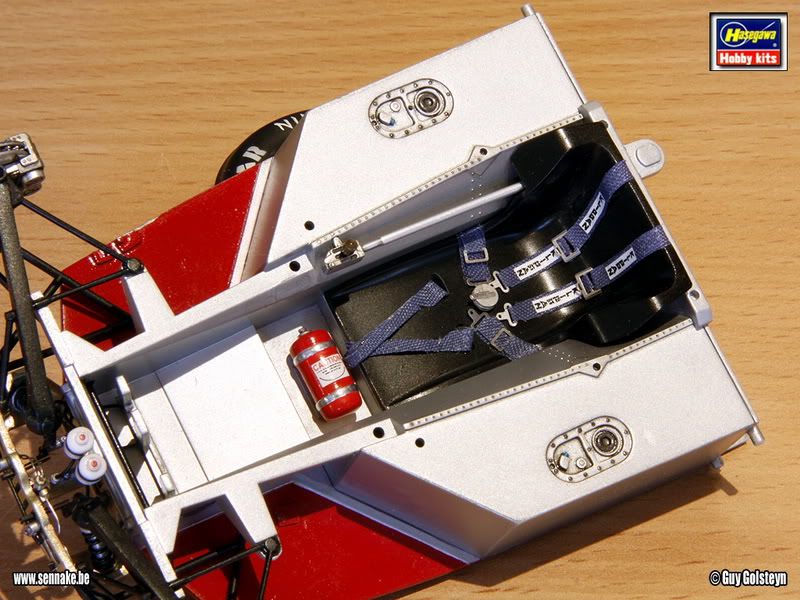
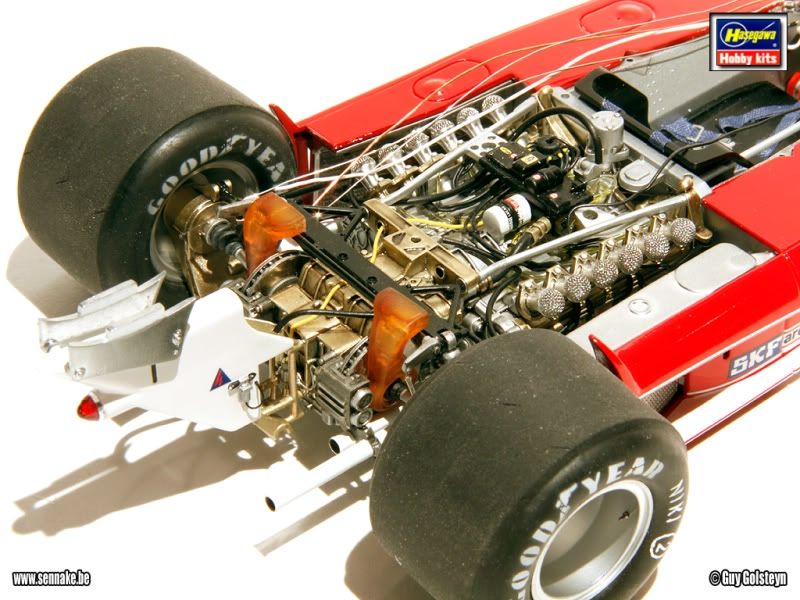
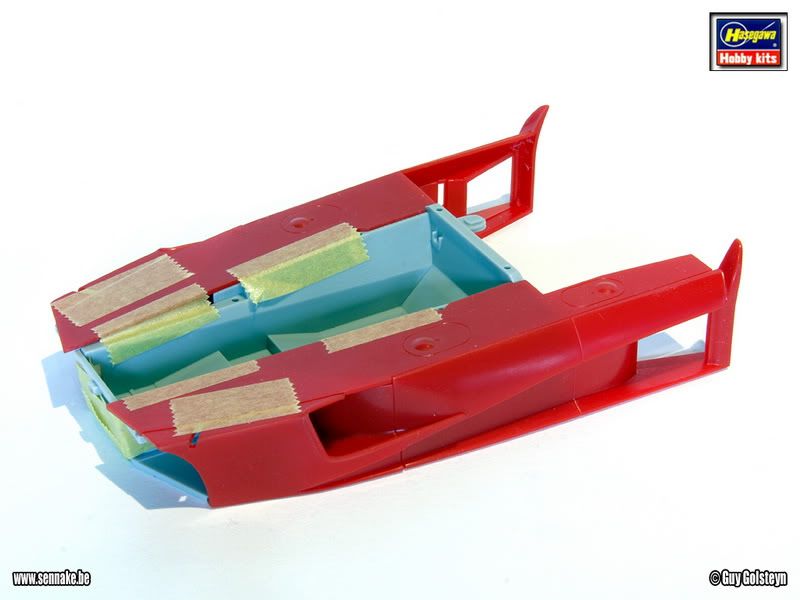
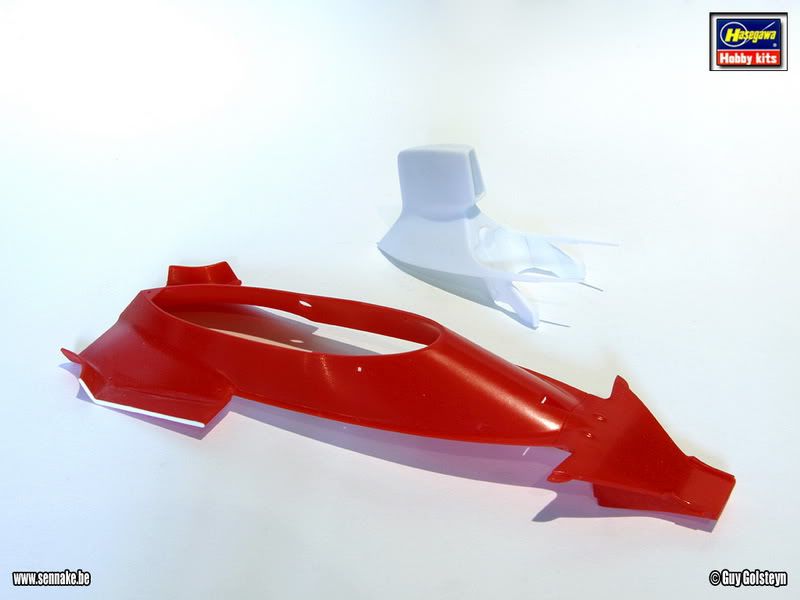
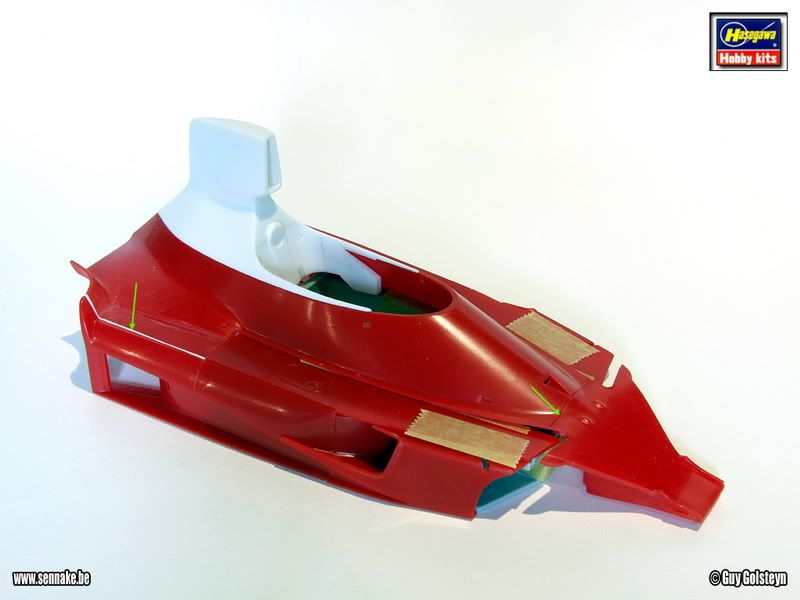
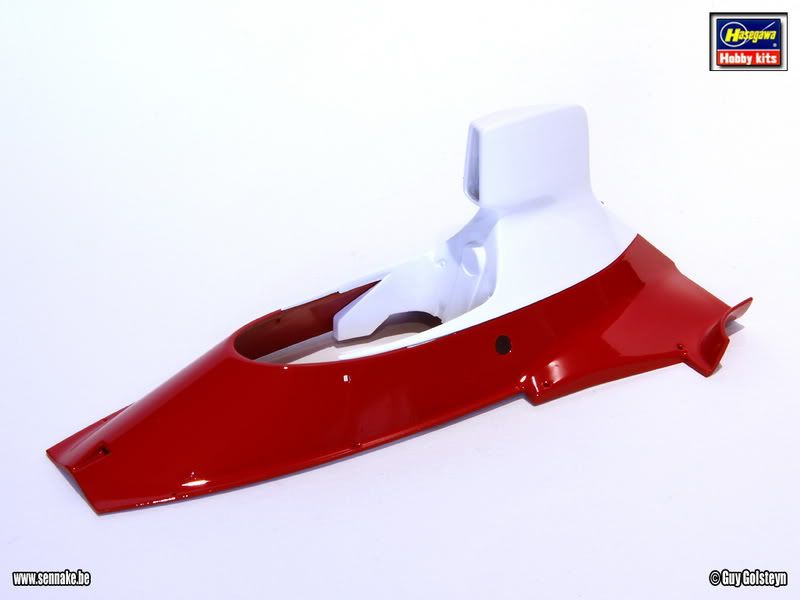
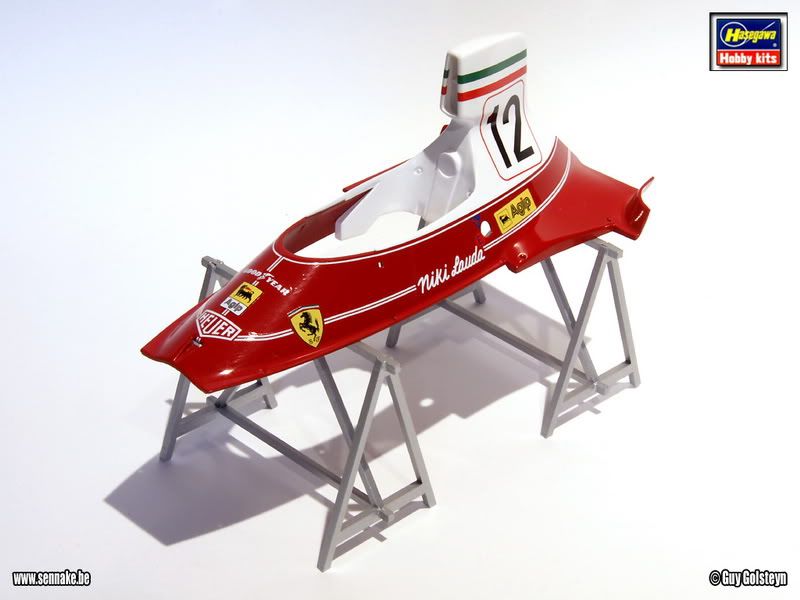
The body panels on top of the cockpit and to the sides are fixed to the chassis.


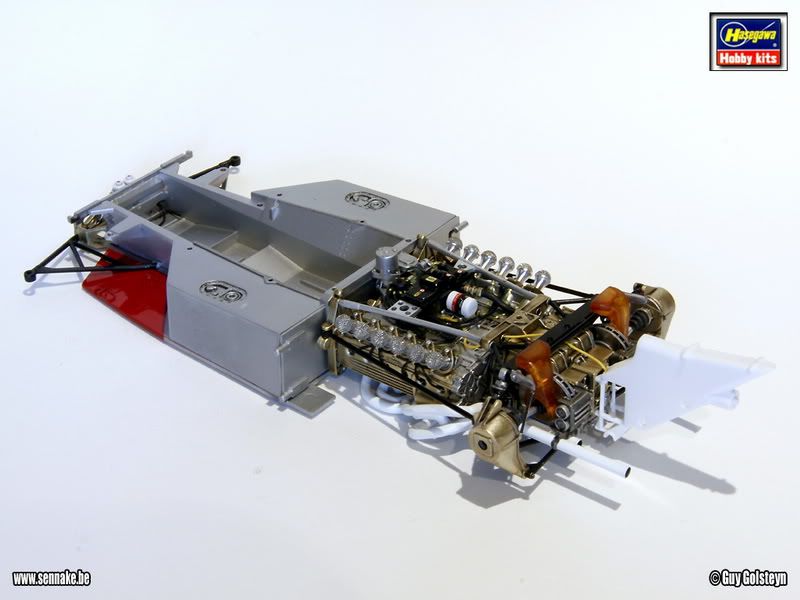
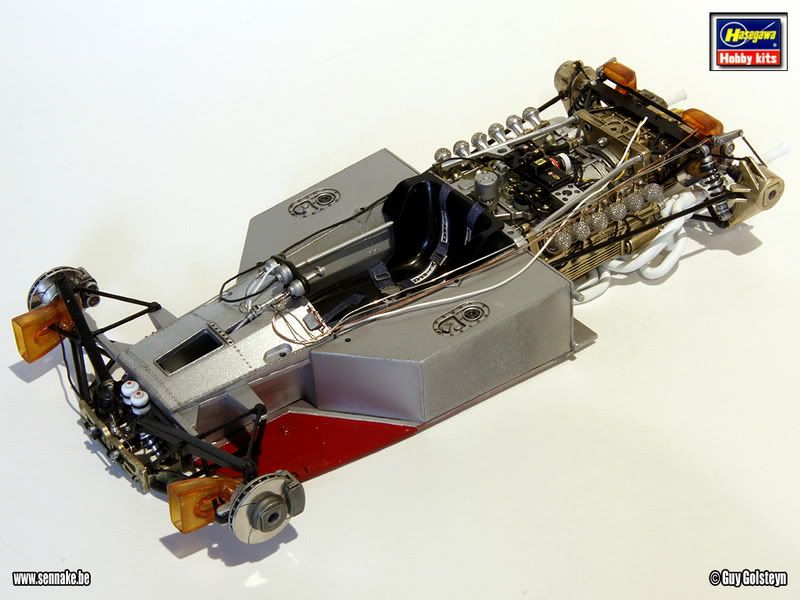
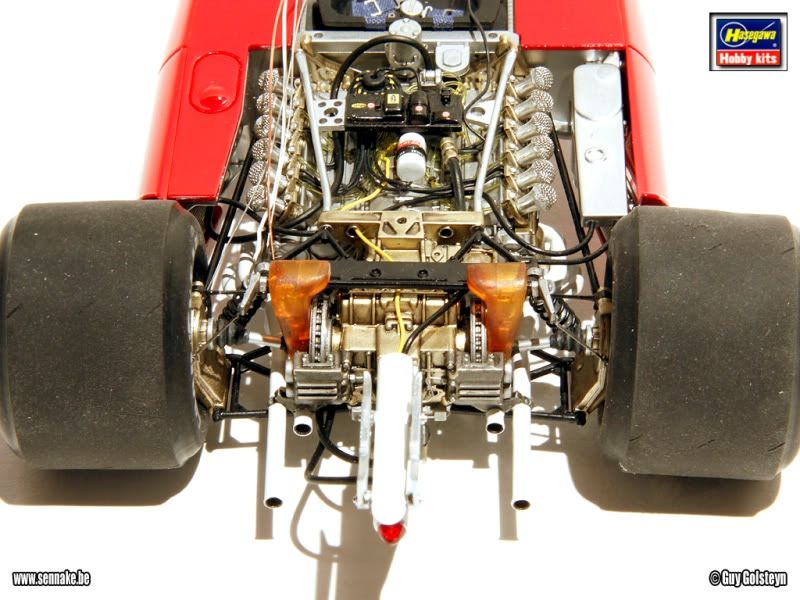
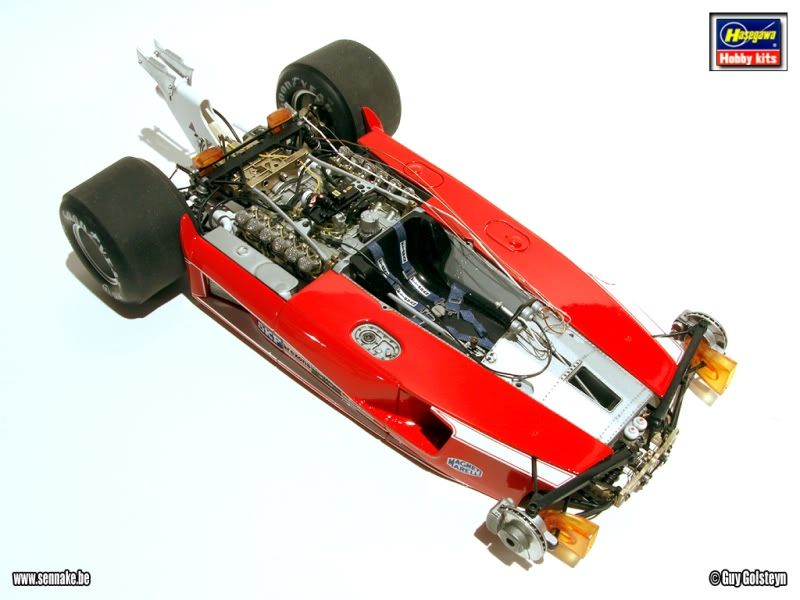
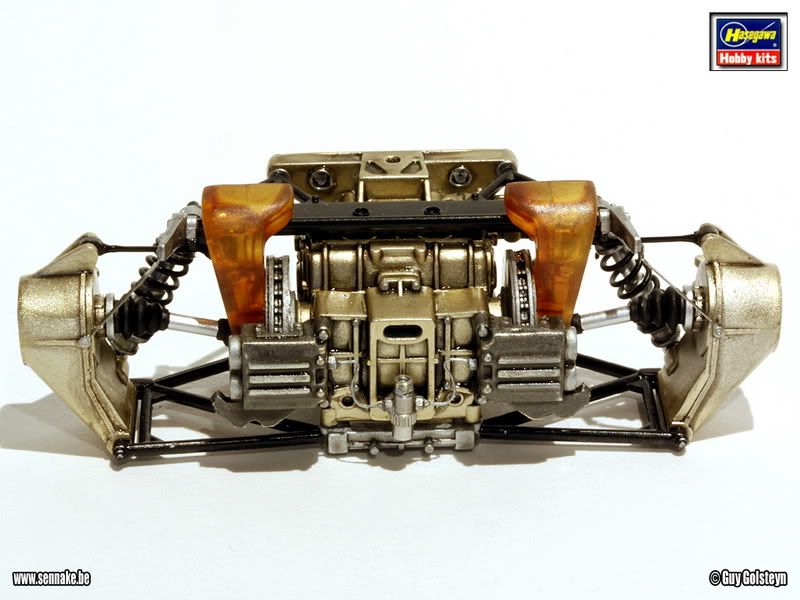
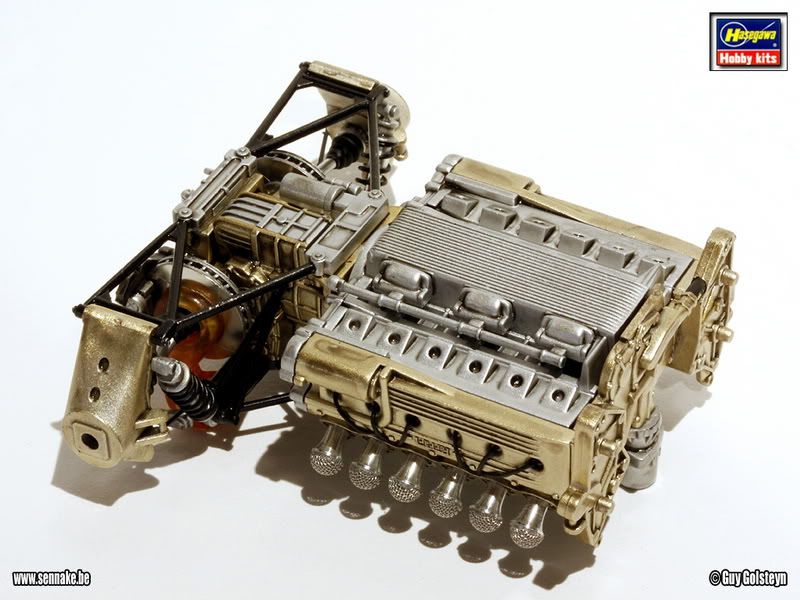
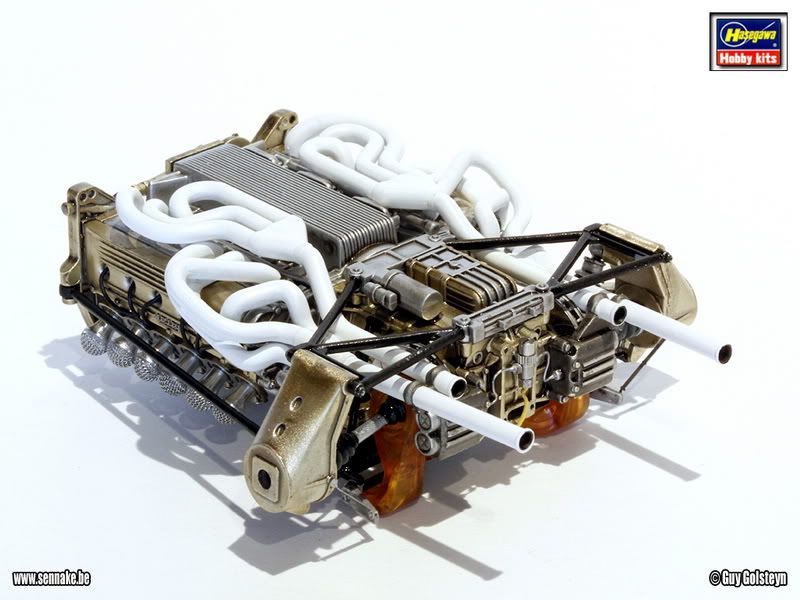
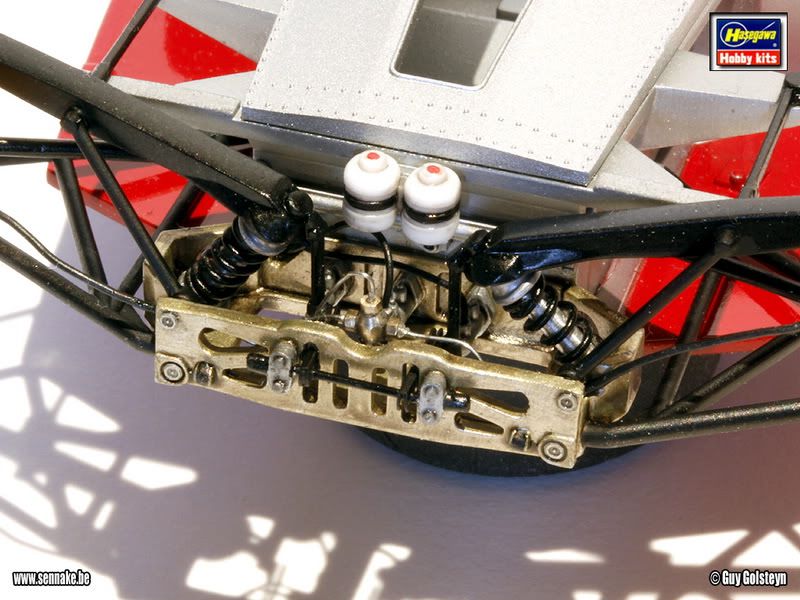
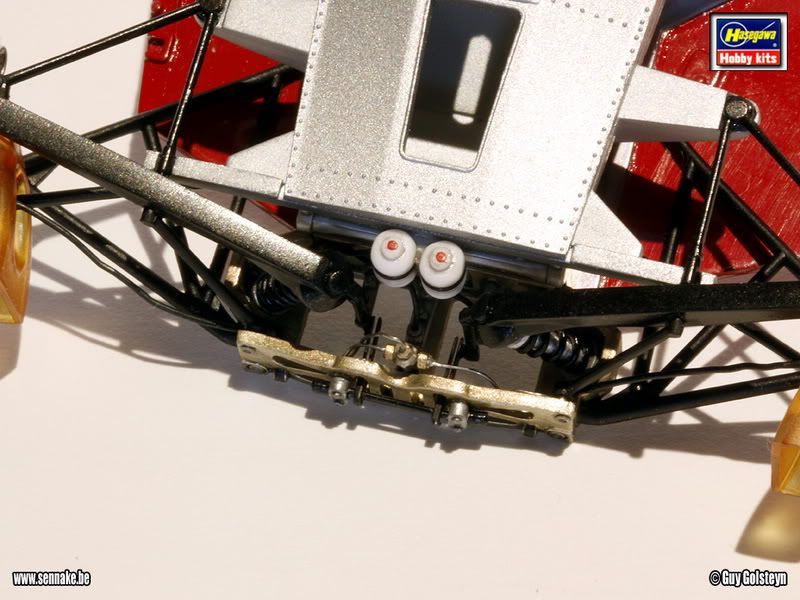
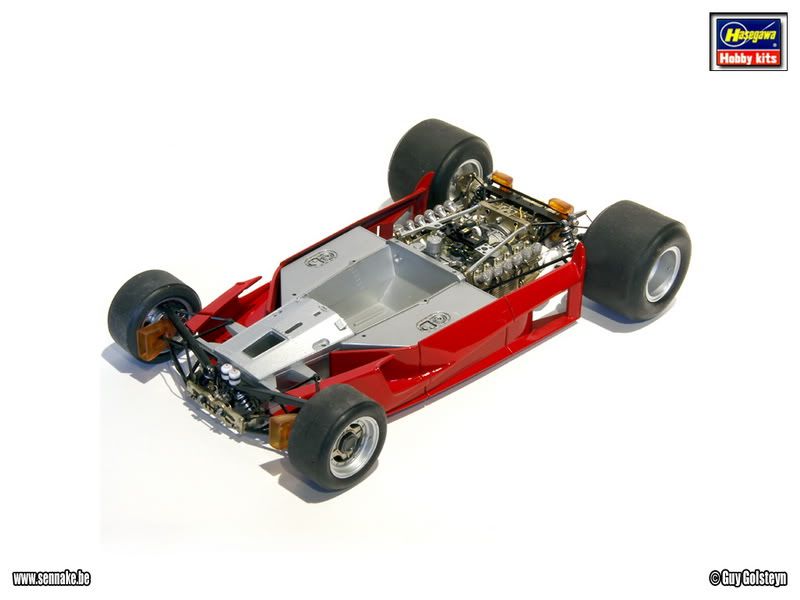
Here you see a picture from the rear where you can see the extra wiring and ducts. I didn't copy everything I could see at the reference pics because part of it wouldn't be noticeable anyway, and because it would 'overload' the total image as well.


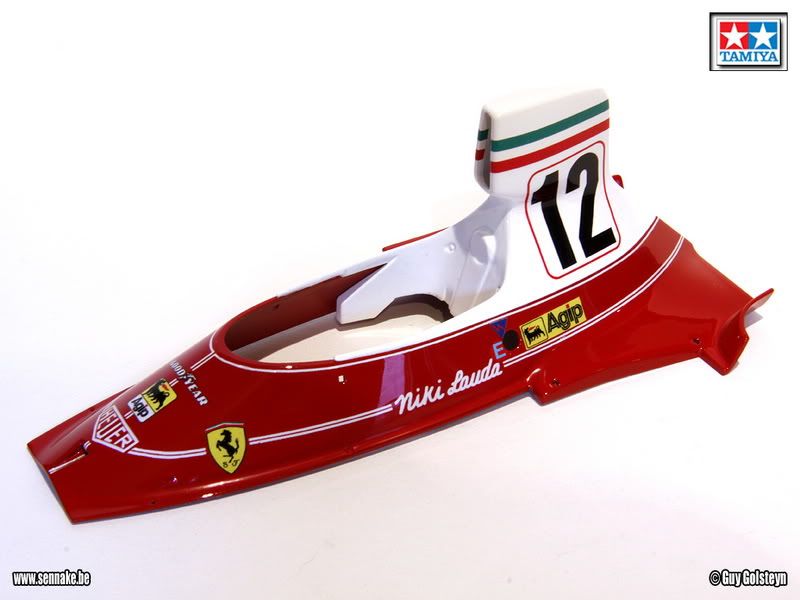
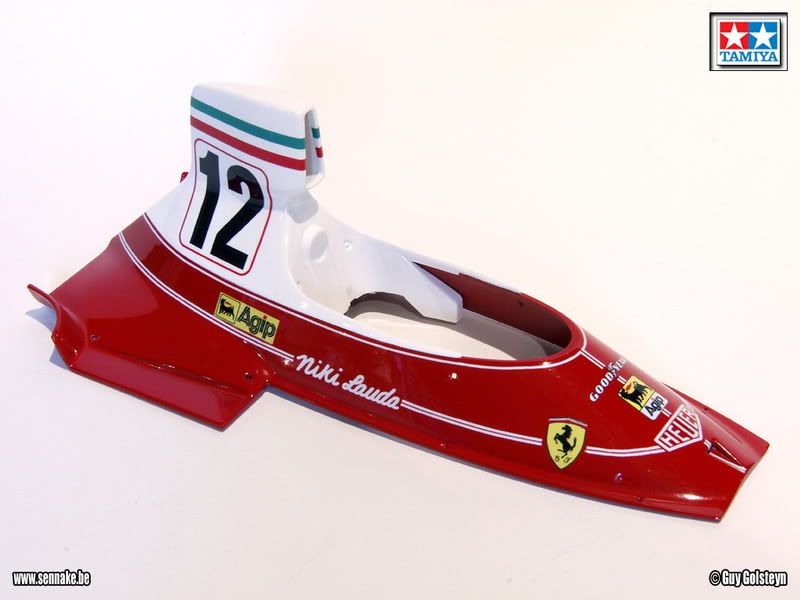
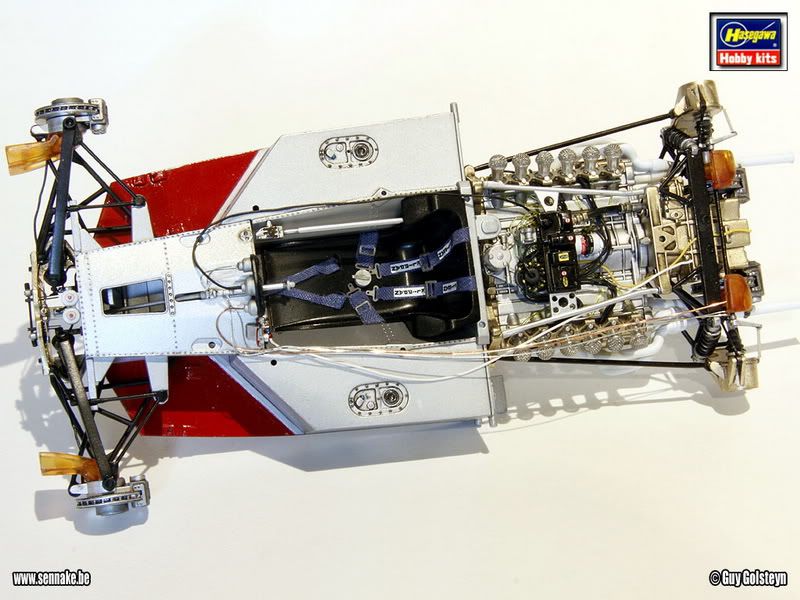
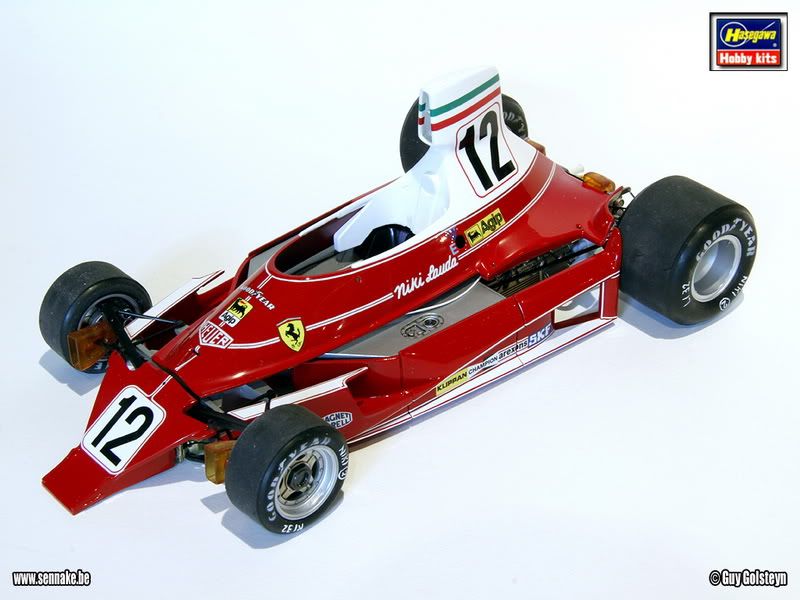
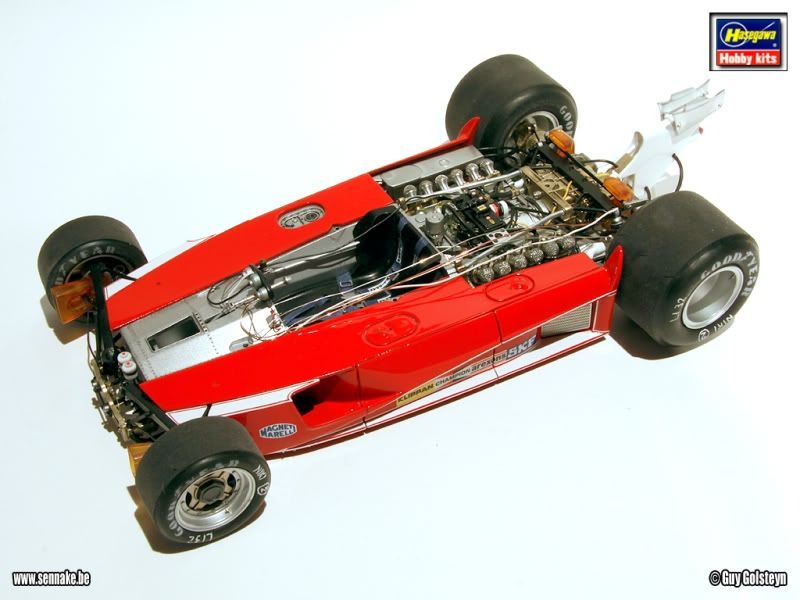
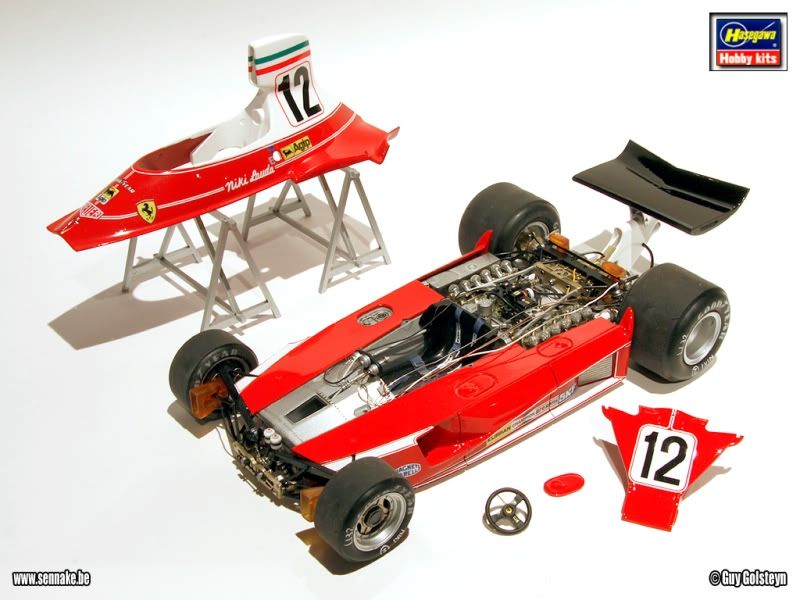
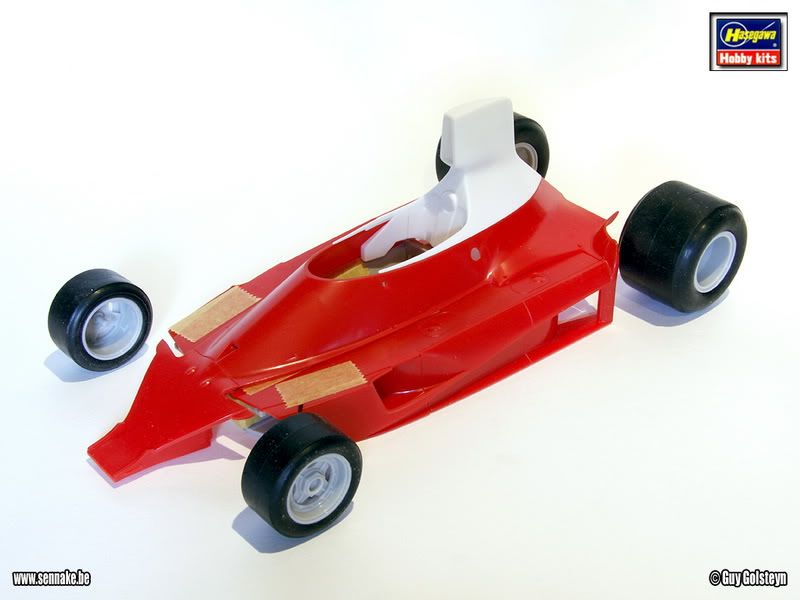
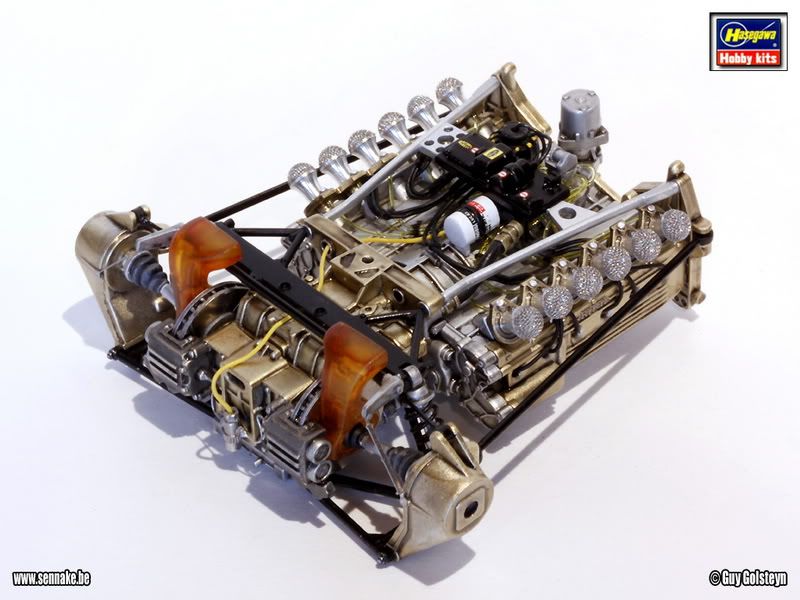
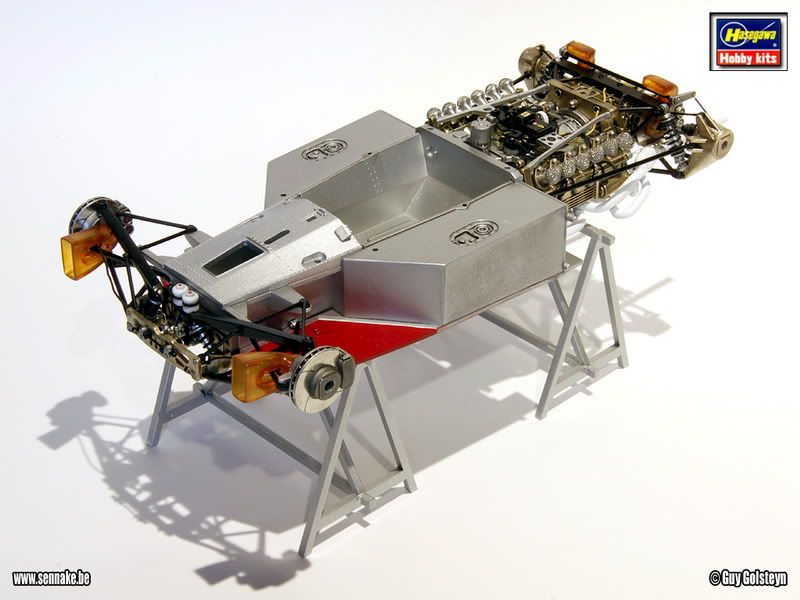
A complete image of the Ferrari.


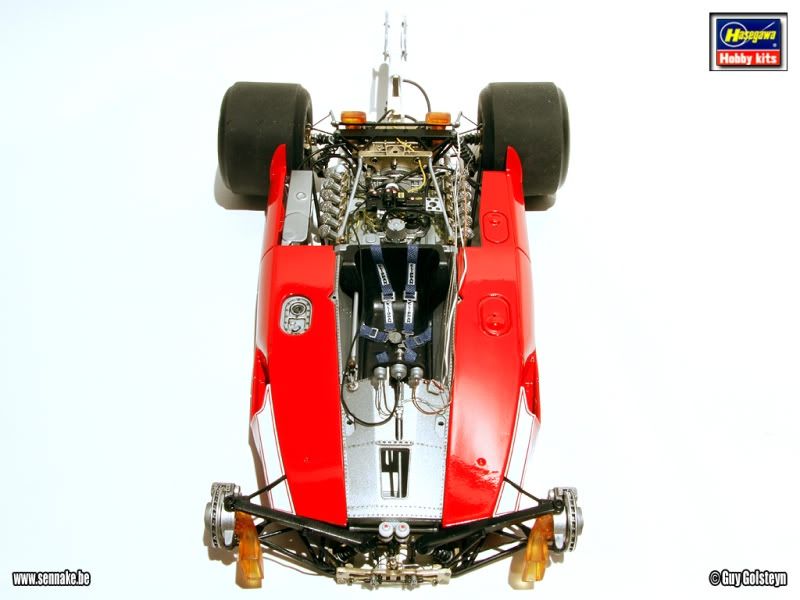
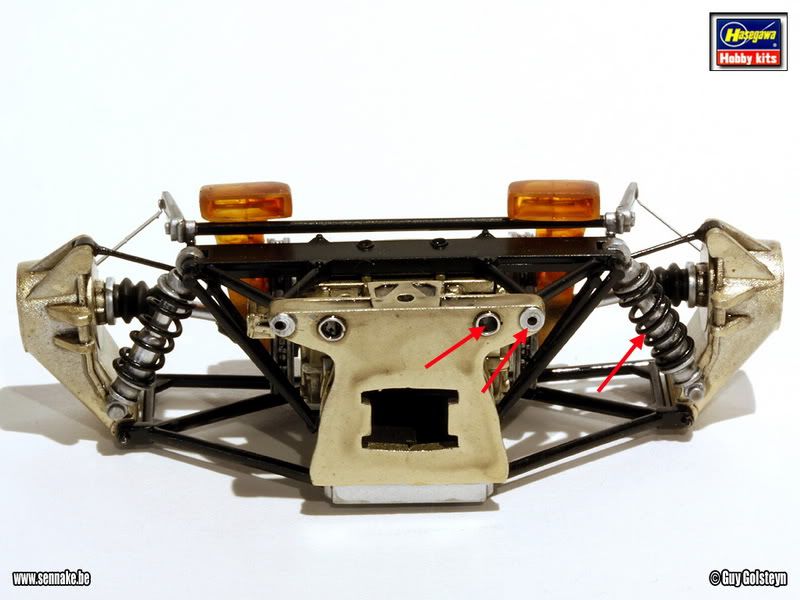
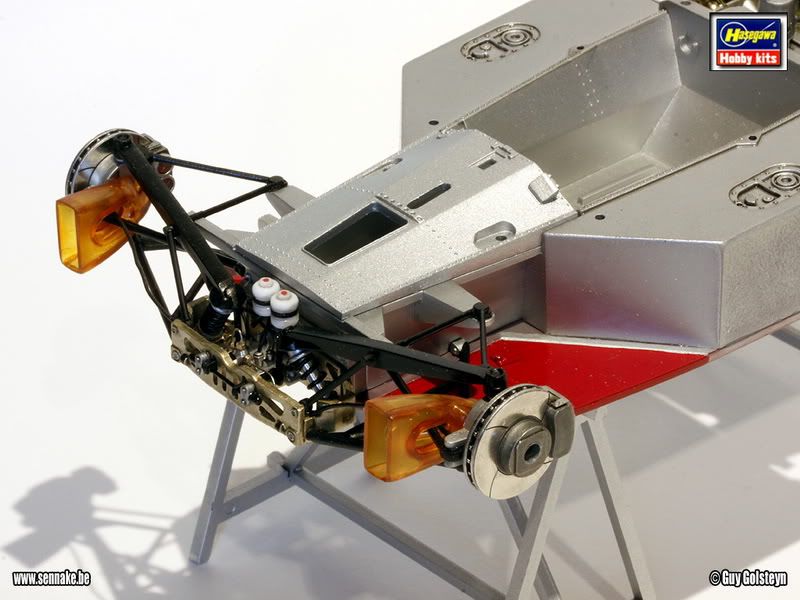
Same thing seen from the front.


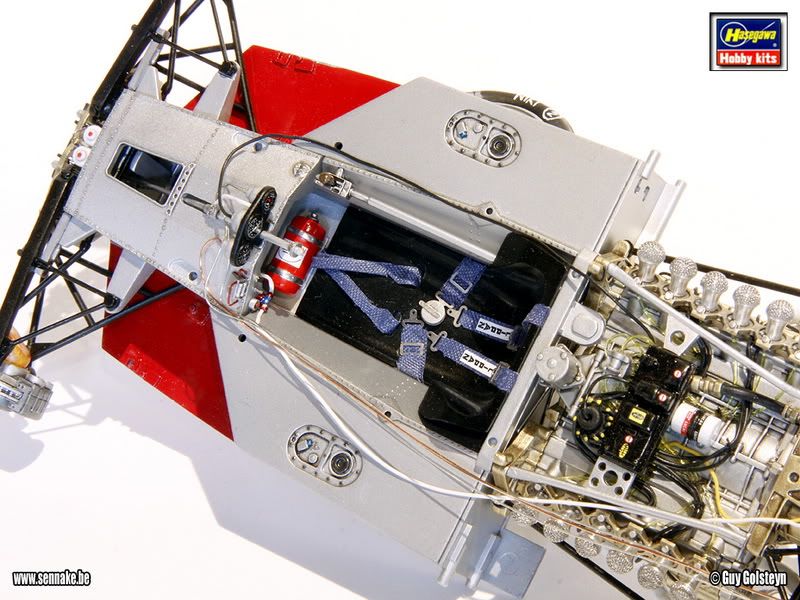
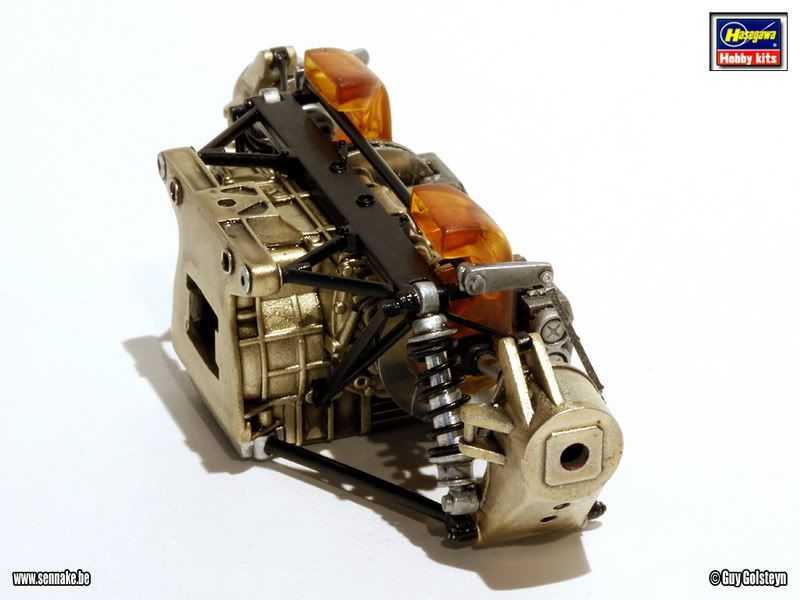
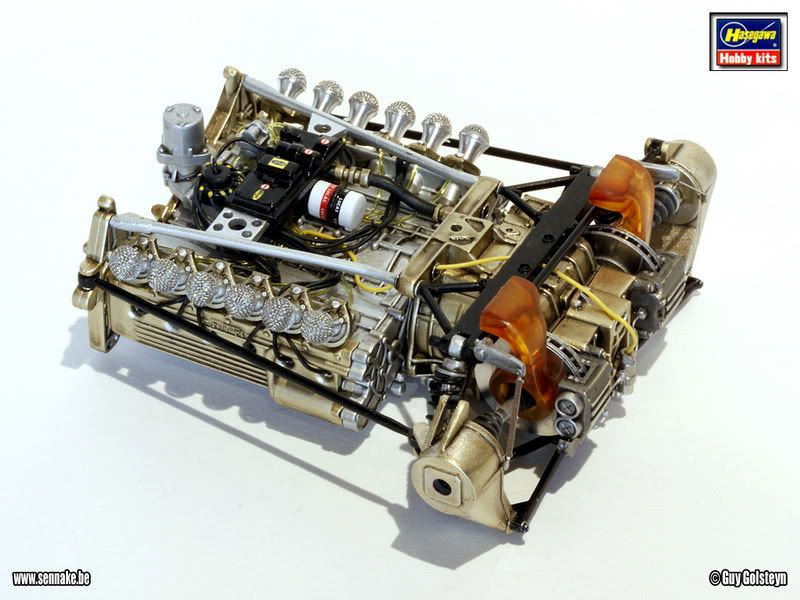
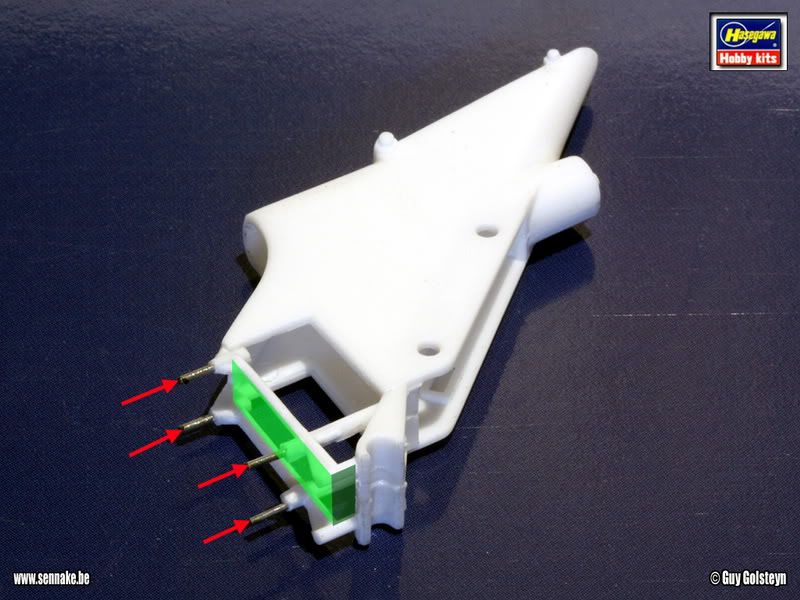
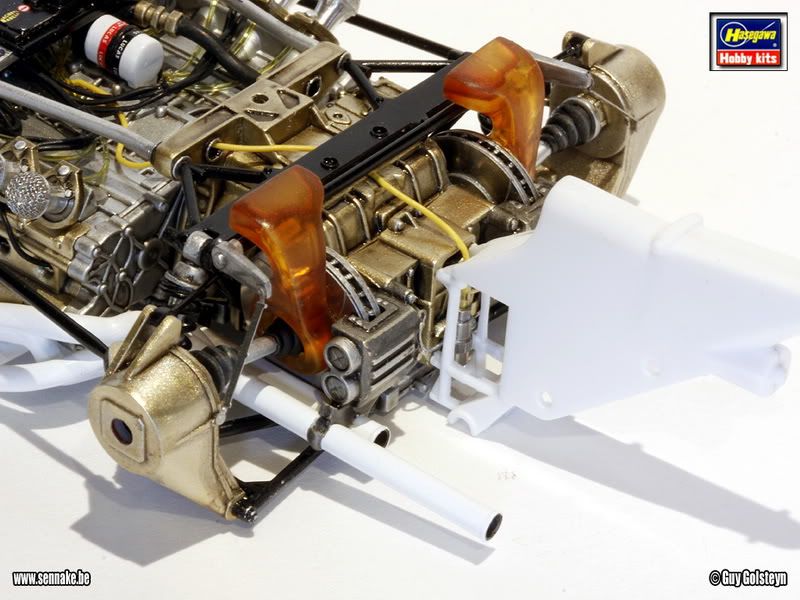
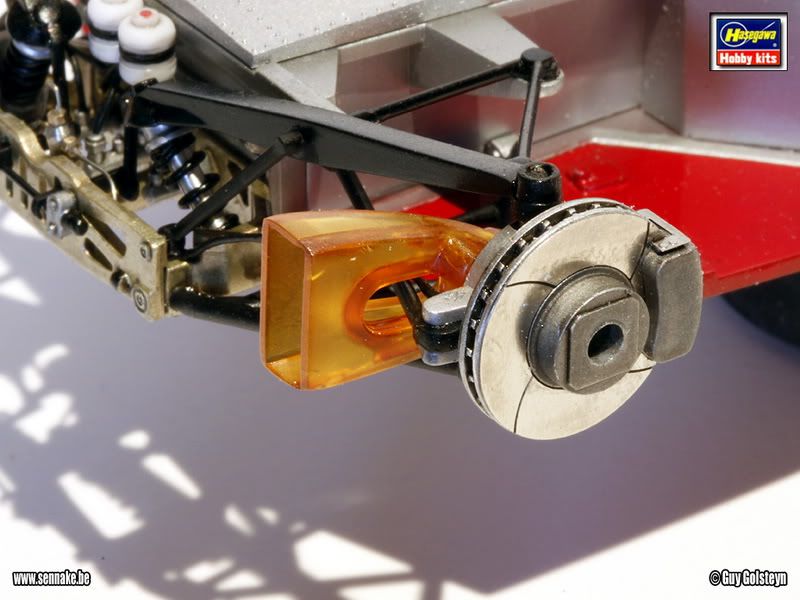
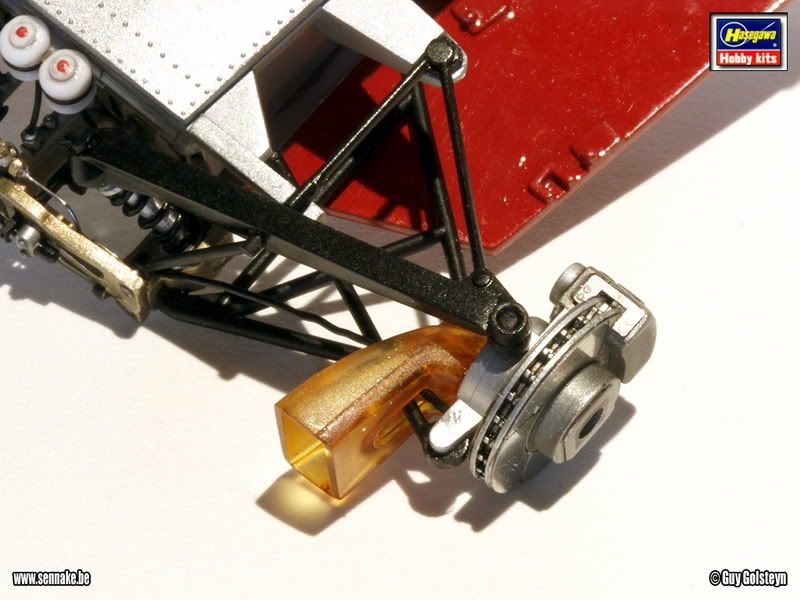
What I would like to show you here is something I unfortunately forgot to photograph before assembly. You see a small slot in the bodywork. I always wondered what the function of this slot was. Now it turns out that there is a looking glass where you can see the oil level. I painted the clear parts partially in clear orange to create the impression that the oil cooler was filled halfway. It looked nice, but unfortunately it is covered by the bodywork now, so the only thing you can do is look through the slot (just as the real thing) to see the oil level. But that will hardly be noticeable on the picture I'm afraid. What you will see clearly here however, is the radiator grill.


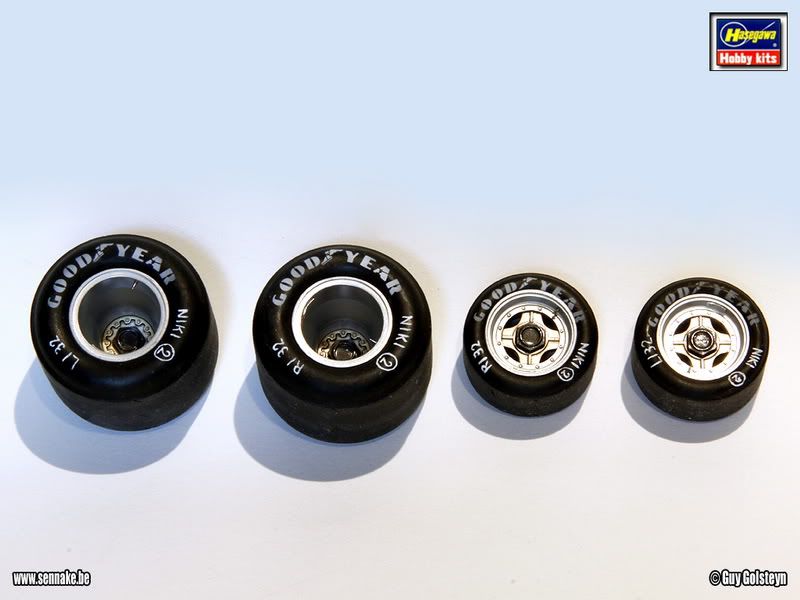
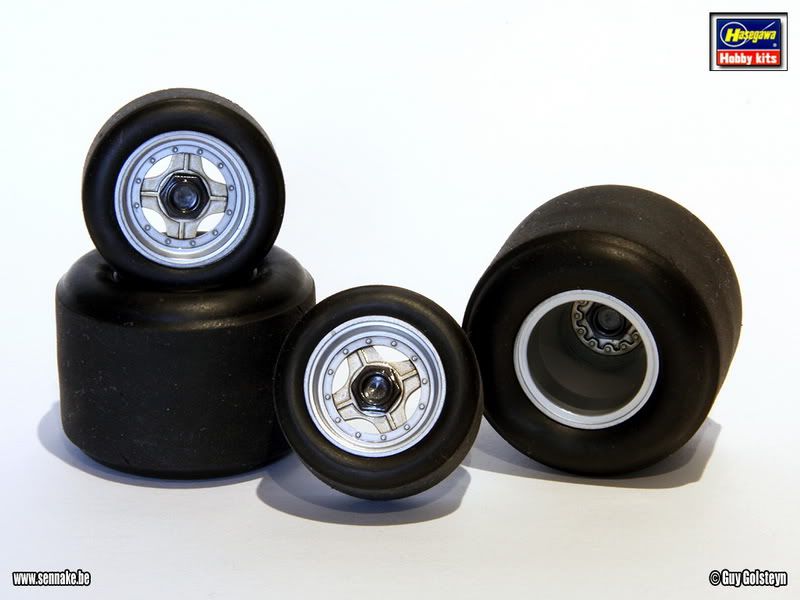
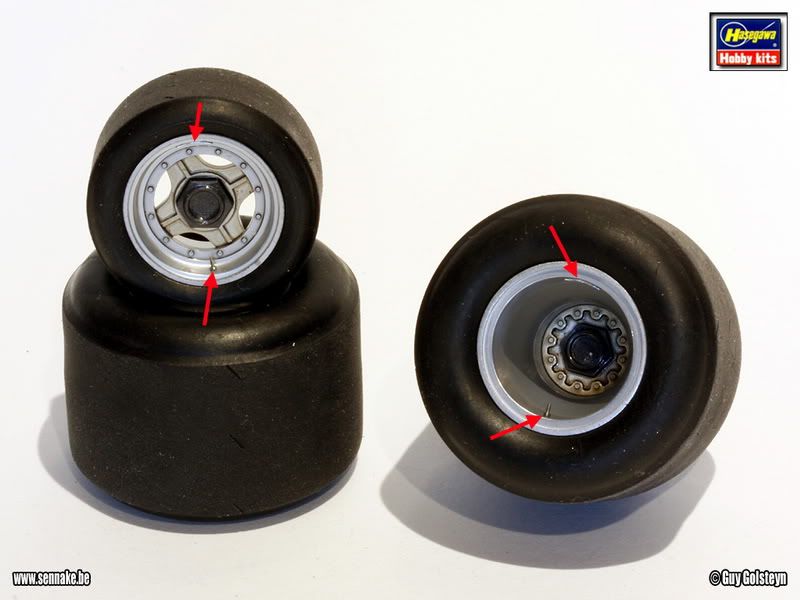
Next i fixed the front wheels...


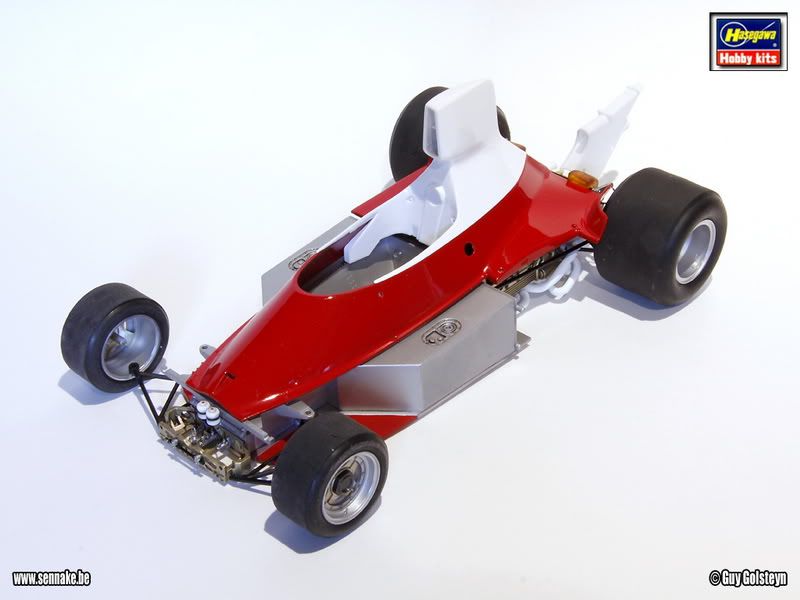
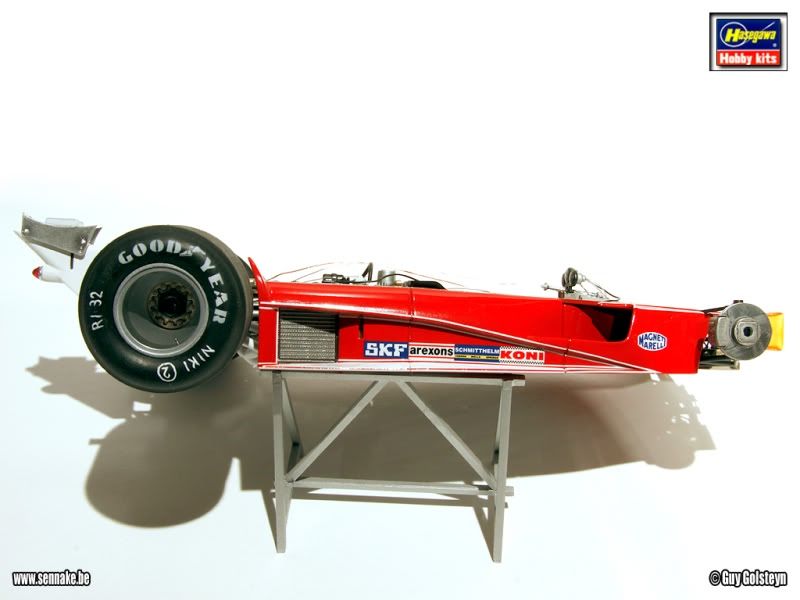
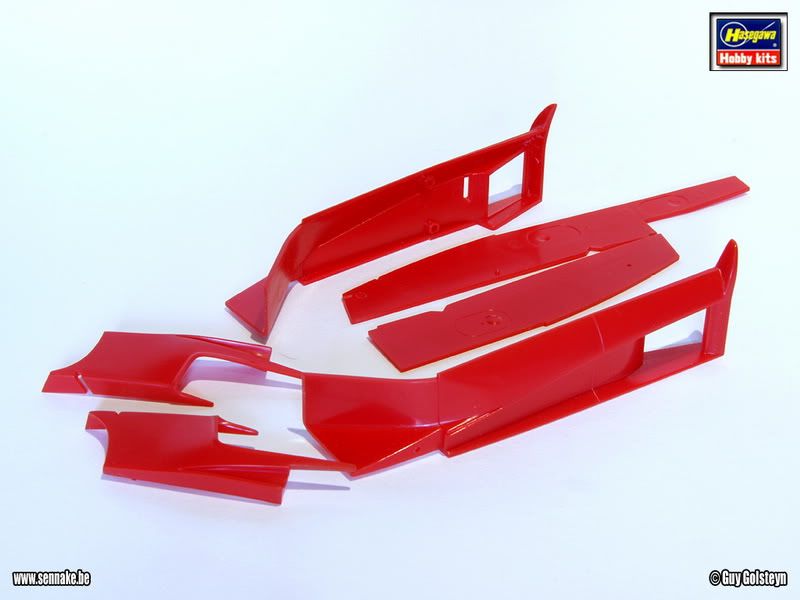
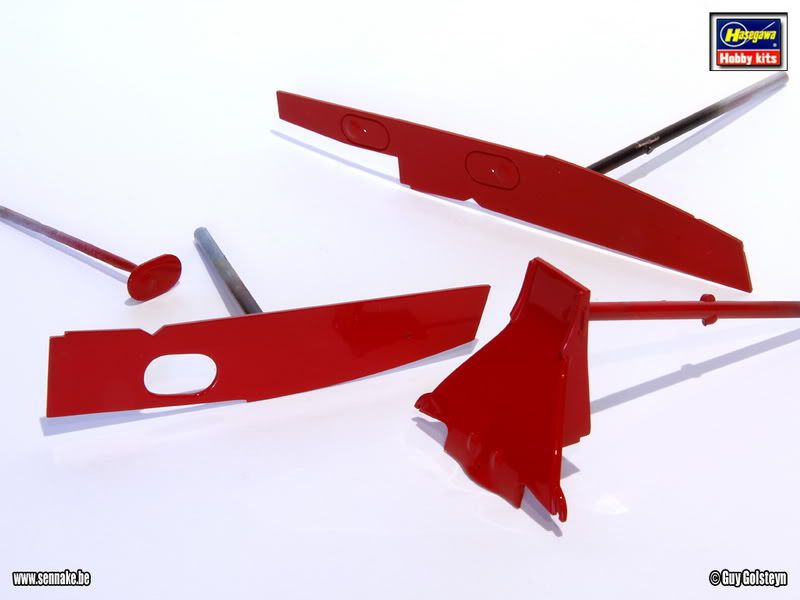
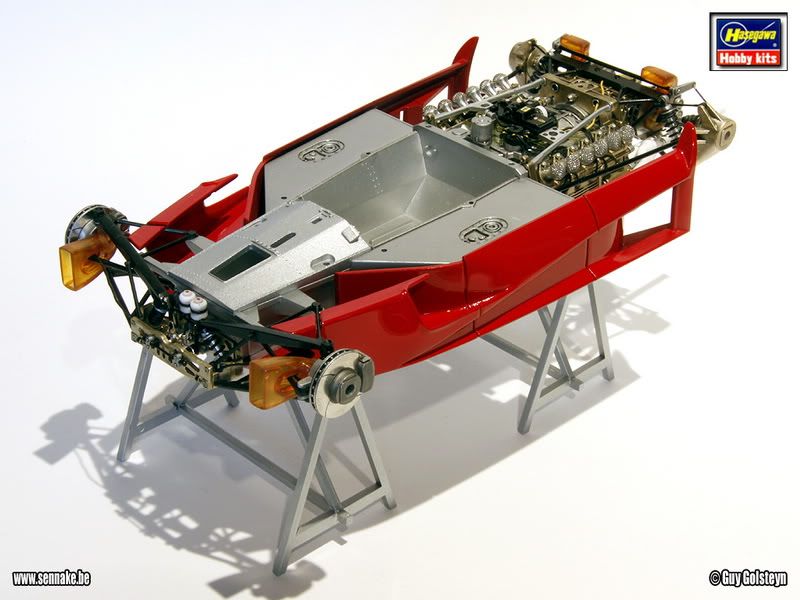
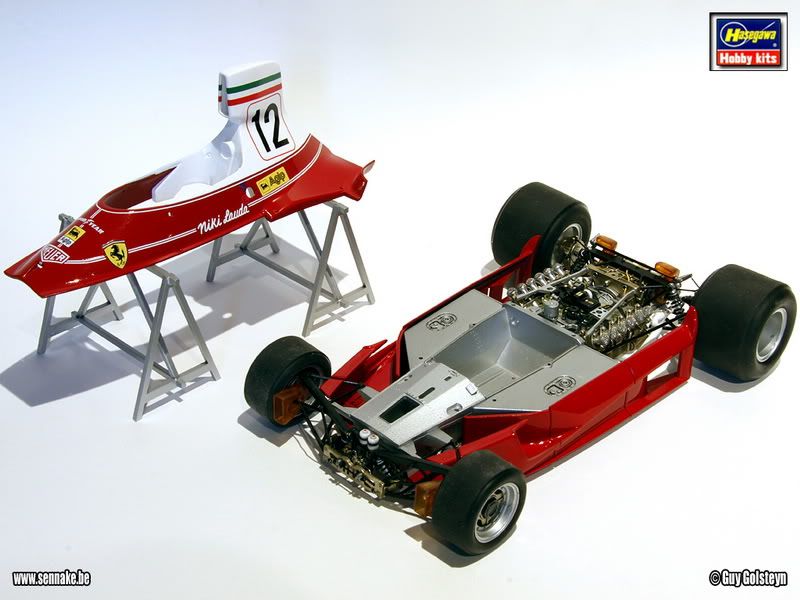
Finally an image of how I want to expose the model once it will be finished, more or less. Also notice the rear wing painted in gloss black, which is the base color for the chrome color that will be sprayed on top of it. The front spoiler looks the same by the way.


To be continued!

*** WWW.SENNAKE.BE ***

Ähnliche Themen

Werbung